how-to
- Go to Amazon’s website and sign in to your account;
- Under ‘Account & Lists’ select ‘Content and Devices’;
- Go to the ‘Devices’ tab;
- Select the desired Kindle device from the list;
- Expand the window to see the serial.
How to create a specific Bluesky password for each App
By creating a specific password for each app, you not only avoid sharing your Bluesky password, but you can also easily revoke access if you need to.
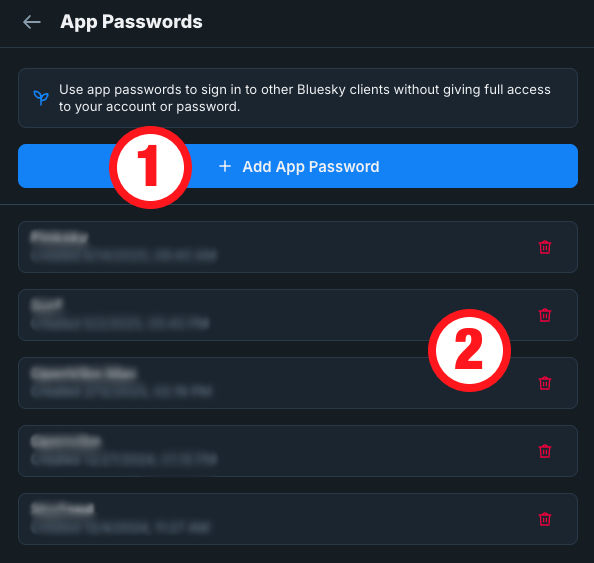
Go to Settings and then click on Privacy & Security. The option we are looking for is App Passwords. Click on it, and if it’s your first time there, you’ll only see the Add App Password button (1). However, as shown in the image below, in my case, there are already some passwords that can be revoked by clicking the trashcan icon (2).
To create a password, click on the Add App Password button and type a name in the box. I always type the name of the app where I’m using that password. It will help me remember where you used that password, in case I want to revoke it in the future.
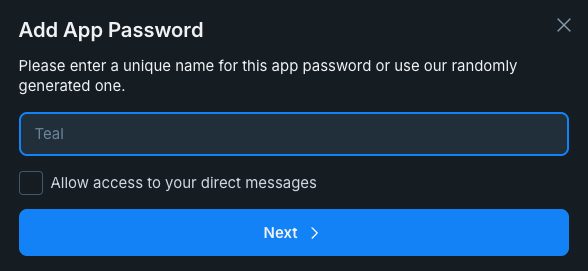
There’s also a box to Allow access to your direct message . This is precisely what it says, and that’s why I prefer to never check that box. But, of course, it’s up to you.
How to instal the DeDRM_tools plugin
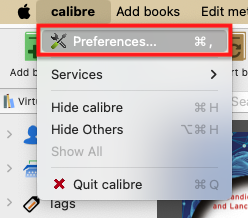
Download the DeDRM_tools plugin, unzip the folder and set it apart. Next, go to the ‘Preferences’ under the ‘Calibre’ menu option. At the bottom of the page, you’ll see the ‘Plugins’ button. Click on it. Next, click on the button ‘Load plugin from file’.
Navigate to the ‘DeDRM_tools’ folder on your computer, find and select the ‘DeDRM_plugin.zip’ file. Click on ‘Open’, and you’ll see a dialog box asking if you are sure. Click on ‘Yes’ and in the next dialog box, also on ‘OK’.
Now we need to provide the plugin with your Kindle serial number. There are many plugins already installed, so if for some reason, you can’t see the one we just installed, simply search for ‘DeDRM’. Select it and click on the ‘Customize Plugins’ button and then on ‘Kindle eink ebooks’.
You be asked for your Kindle Serial Number. Add the serial number to the box and that’s it.
How to find Kindle's serial number
How to install Android apps on a Supernote using a Mac
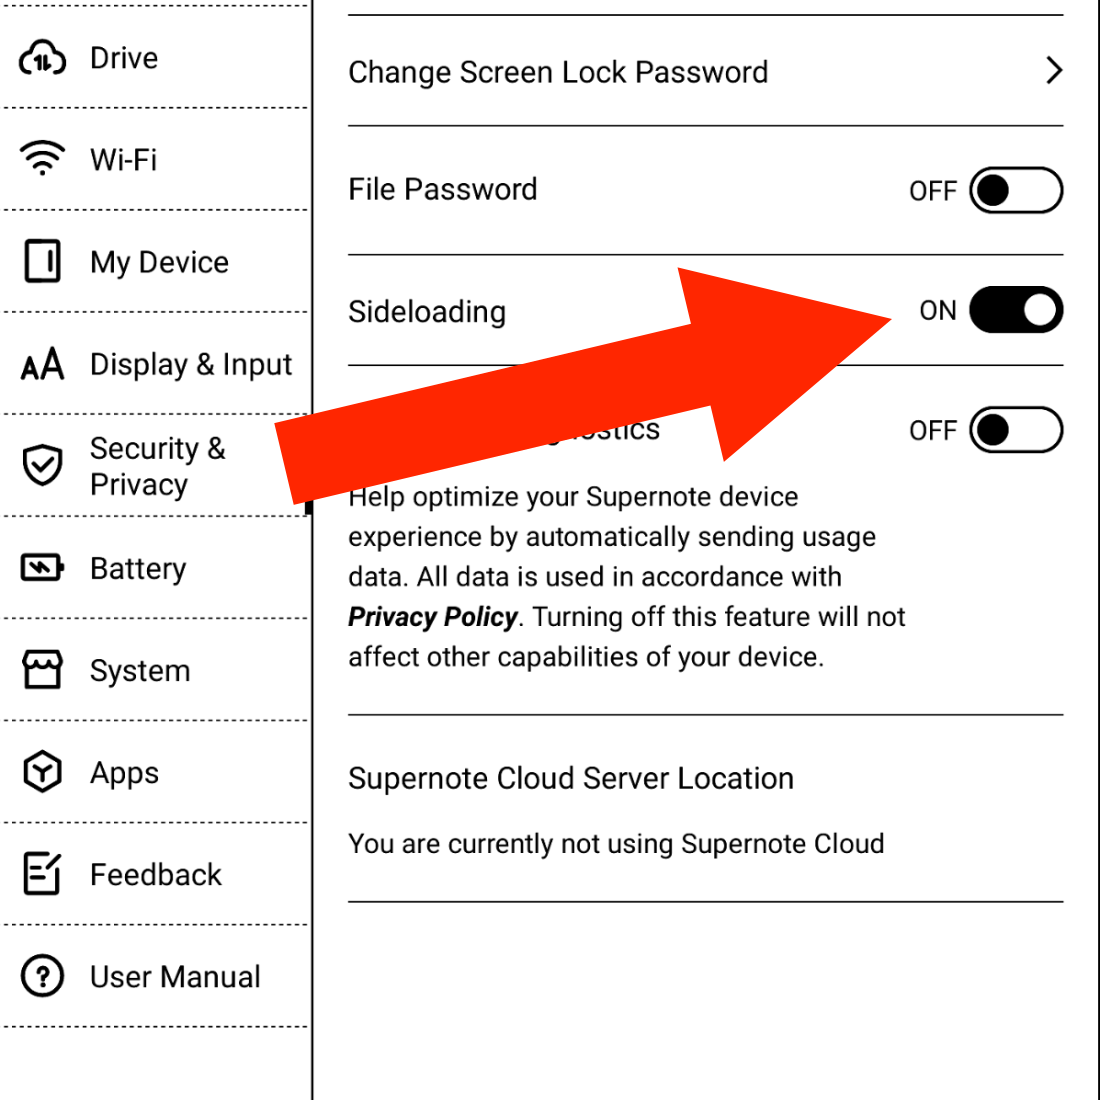
The first step is to prepare the Supernote to receive Android apps. Go to Settings, then Security & Privacy, and then turn on Sidloading. This means that you are allowing the Supernote to accept the installation of Android apps.
Next, we have to make sure the Supernote can connect to the Mac. Under the hood, the Supernote is an Android device, so we will need to install an app on the Mac to allow both of them to talk to each other. This step was a bit of a pain for me. After trying different options, MacDroid was the one that worked. If that does not work for you, please search for other options on Google and try them.
I suggest using the Supernote USB cable, as not all USB cables are the same, technically speaking.
Now we need to get the Android apps ready. Obsidian offers the APK on its website, which, I think, is an excellent practice, as they are the company behind the app.
I am also using Syncthing-Fork, which I downloaded from the developer’s GitHub page. However, if you are using Obsidian Sync, you don’t need Syncthing. Please download either one or both and place them aside for now.
Next, download and install Homebrew. You’ll find the instructions on their website. Just follow the steps. This app is needed to install the next app on your Mac.
Now download the Android SDK Platform-Tools, which is what will actually talk to the Supernote. To install it, you’ll have to use a command on the Terminal.
To open the Mac Terminal, hold the Command key and press the Space Bar. Type Terminal in the search box and click to open the Terminal. In the Terminal window, write the following code:
brew install android-platform-tools
When you hit Enter, Homebrew will install the Android SDK Platform-Tools on your computer. You’ll see some code scrolling on the screen and then a message that says it was installed successfully.
Now it’s time to connect your Supernote to the computer, and make sure MacDroid can see it as a device.
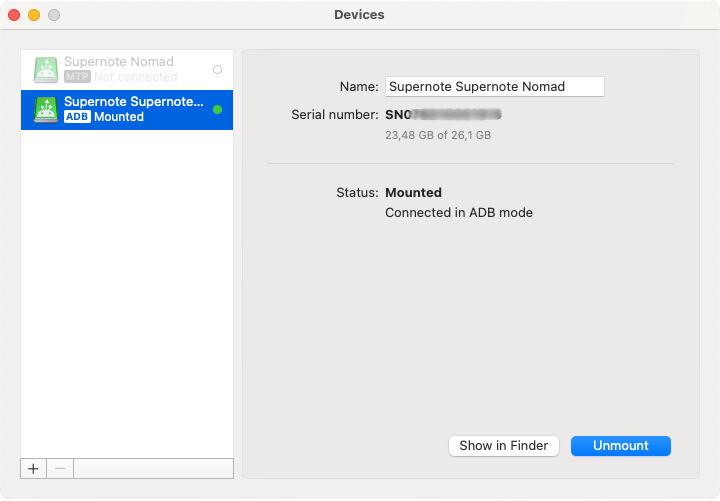
If you get a screen like the one above, go back to the Mac Terminal and type the code below to make sure the system is seeing it:
adb devices
You should get a message similar to the one below.

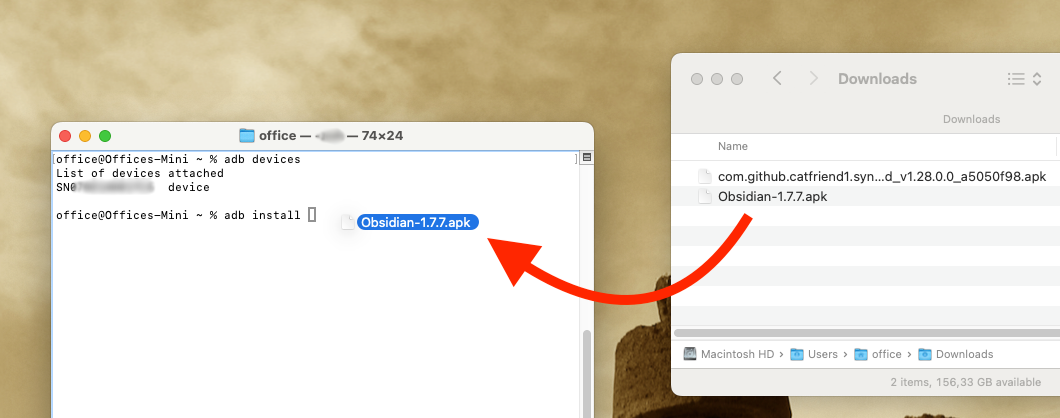
Finally, it’s time to install the Obsidian APK (Android file). Go back to the Mac Terminal and type adb install, followed by the path to the APK file on your computer. In my case, it looks like this:
adb install /Users/office/Downloads/Obsidian-1.7.7.apk
Alternatively, you can type adb install, hit space, and using the mouse, click and drag the APK file to the front of the command. That will create the path for you. Hit Enter and wait until you see the success message.
That’s it. To install other apps, repeat adb install command, adding the path to the app on your computer.
How to customize the Tiny Theme Archive page on Micro.blog
In a recent video, I told Manton, the creator of Micro.blog, that I would prefer if the blog categories on the Archive Page were horizontally displayed, instead of the current list. To my surprise, the solution arrived a day after I published the video.
When Otávio finished listening to the episode, he wrote a code (below) to do just the task. Now it’s my turn to give back to the community. The video below shows how you can use Otavio’s code to customize your own Archive page.
{{ define "main" }}
<div class="archive">
	<h2 class="p-name">Archive</h2>
	{{ if templates.Exists "partials/microhook-archive-lead.html" }}
	{{ partial "microhook-archive-lead.html" . }}
	{{ end }}
	{{ $list := ($.Site.GetPage "taxonomyTerm" "categories").Pages }}
	{{ if gt (len $list) 0 }}
	<div class="archive-categories">
		<h3>Categories</h3>
        <span>
	        {{ $sortedList := sort $list "Title" }}
	        {{ $length := len $sortedList }}
    	    {{ range $index, $element := $sortedList }}
        	    <a href="{{ $element.Permalink }}">{{ $element.Title }}</a>{{ if lt $index (sub $length 1) }}, {{ end }}
	        {{ end }}
        </span>
	</div>
	{{ end }}
	<div class="full-archives h-feed">
		<h3>Full Post List</h3>
		{{ $list := (where .Site.Pages "Type" "post") }}
		{{ range $list }}

		<p class="h-entry">
			<a href="{{ .Permalink }}" class="u-url"><span class="dt-published" datetime="{{ .Date.Format "2006-01-02T15:04:05-0700" }}">{{ .Date.Format "Jan 2, 2006" }}</span></a>:
			{{ if .Title }}
			<span class="p-name"><b>{{ .Title }}</b></span>
			{{ end }}
			<span class="p-summary">{{ .Summary | truncate 150 }}</span>
		</p>

		{{ end }}
	</div>

</div>
{{ end }}